quic ngtcp2相关库实践 1 相关库:可以自行搜索:
拉取和安装脚本: 1 2 3 4 5 6 7 8 9 10 11 12 13 14 15 16 17 18 19 20 21 22 23 24 25 26 27 28 29 30 31 32 33 34 35 36 37 38 39 40 41 42 43 44 45 46 47 48 49 50 51 52 53 54 55 56 57 58 59 60 61 62 63 64 65 66 67 68 69 70 71 GET_all GET_OpenSSL_1_1_1n_quic GET_nghttp3 GET_ngtcp2 } GET_OpenSSL_1_1_1n_quic WARN "getting OpenSSL_1_1_1n+quic" mkdir quic cd quic rm -rf openssl git clone --depth 1 -b OpenSSL_1_1_1n+quic https://github.com/quictls/openssl cd openssl ./config enable-tls1_3 --prefix=$PWD /build make -j12 make install_sw WARN "get OpenSSL_1_1_1n+quic done" cd .. cd .. } GET_nghttp3 WARN "getting nghttp3" mkdir quic cd quic rm -rf nghttp3 git clone https://github.com/ngtcp2/nghttp3 cd nghttp3 autoreconf -i ./configure --prefix=$PWD /build --enable-lib-only make -j$(nproc ) check make install WARN "get nghttp3 done" cd .. cd .. } GET_ngtcp2 WARN "getting ngtcp2" mkdir quic cd quic rm -rf ngtcp2 git clone https://github.com/ngtcp2/ngtcp2 cd ngtcp2 autoreconf -i ./configure PKG_CONFIG_PATH=$PWD /../openssl/build/lib/pkgconfig:$PWD /../nghttp3/build/lib/pkgconfig LDFLAGS="-Wl,-rpath,$PWD /../openssl/build/lib" --prefix=$PWD /build make -j$(nproc ) check make install WARN "get ngtcp2 done" cd .. cd .. } if [[ ! -d third_party ]];then mkdir third_party fi cd third_party
2 使用ngtcp2的example下的client和server进行编译和测试: 在ngtcp2/examples下make即可
测试,这里使用同机器:
1 2 3 4 5 6 7 8 9 10 11 12 13 14 15 关于key 文件和crt文件: crt 和 key 文件代表证书的两个部分,key 是证书的私钥,而 crt 是签名证书(数字证书) 包含公钥。 这只是生成证书的一种方法,另一种方法是在 pem 文件中或在 p12 容器中同时使用。 你有几种方法来生成这些文件,如果你想自签名证书,你可以发出这个命令 openssl genrsa 2048 > host.key chmod 400 host.key openssl req -new -x509 -nodes -sha256 -days 365 -key host.key -out host.cert 请注意,对于自签名证书,您的浏览器会警告您该证书不是“受信任的”,因为它没有由浏览器信任列表中的证书颁发机构签名。 从那里开始,您可以通过创建 CA 来生成自己的信任链,也可以从 Verisign 或 Thawte 等公司购买证书。 关于TLS的流程: https://segmentfault.com/a/1190000021559557
step1: 先生成私钥和证书(证书包含公钥)
导出sslkeylogfile: 用于wireshark解密时用
开启抓包:sudo tcpdump -i any -nn -w webserver.pcap port 4433
启动server:
启动client
使用wireshark打开并解密:https://support.f5.com/csp/article/K05822509
1
2
3
4
5
6
7
8
9
Copy the two files , ssl-secret.log and quic.pcap, generated in the previous procedure to your client system . Open the Wireshark application. Note: You need Wireshark 3.2 .0 or later. Go to Edit > Preferences > Protocols > TLS. For the (Pre)-Master-Secret log file name, select Browse and locate the ssl-secret.log file Go to Edit > Preferences > Protocols > QUIC. For QUIC UDP port, enter the port number of your BIG-IP virtual server. Select Ok. The quic.pcap file is decrypted.
至此我们可以看到quic基本流程:
基本流程;
分析流程:
1
2
3
4
5
6
7
8
9
10
11
12
client initial: ----> server: 具体内容: 2022-03-11 17:47:13.987506 127.0.0.1 28678 127.0.0.1 QUIC 1406 Initial, DCID =c6d945cf7c119afd94d5d3b4de6e0bf873fb, SCID =caadeb24055bf422d3693bb97b0c5c691b, PKN: 0, CRYPTO, PADDING( long header packet:Initial CRYPTO Frame:TLSV:handshake protocol : Client hello Parameter: initial_source_connection_id (len =17) 。。。 Parameter: initial_max_data (len =4) 1048576 PADDING Frame ) udp payload
2 server回复client ack和initial,以及握手信息,携带自己的公钥证书
1
2
3
4
5
6
7
8
9
10
11
12
client <---------------- server : ack, initial, handshake 2022-03-11 17:47:13.993535 127.0 .0 .1 4433 127.0 .0 .1 QUIC 1406 Handshake, DCID=caadeb24055bf422d3693bb97b0c5c691b, SCID=31399ddaebfaa9d3ffe05b3f460ce31abf24, PKN: 0 , CRYPTO ( long header packet : initial ACK Frame: CRYPTO Frame:TLSV:handshake protocol : Server hello long header packet : handshake CRYPTO Frame:TLSV: Handshake Protocol: Multiple Handshake Messages Handshake Protocol: Encrypted Extensions Handshake Protocol: Certificate Handshake Protocol: Certificate Verify (fragment) ) udp payload
3 server回复client handshake 握手完成,以及stream信息。
1
2
3
4
5
6
7
8
9
10
11
12
13
14
15
16
client <------------------- server : left handshake ,stream frame ( long header packet : handshake CRYPTO Frame:TLSV: Handshake Protocol: Multiple Handshake Messages Handshake Protocol: Certificate Verify (last fragment) Handshake Protocol: Certificate Verify Handshake Protocol: Finished short header packet : STREAM Frame : id 3 STREAM Frame : id 11 STREAM Frame : id 7 Hypertext Transfer Protocol Version 3 Control Stream Hypertext Transfer Protocol Version 3 Qpack Decoder Stream Hypertext Transfer Protocol Version 3 Qpack Encoder Stream ) udp payload
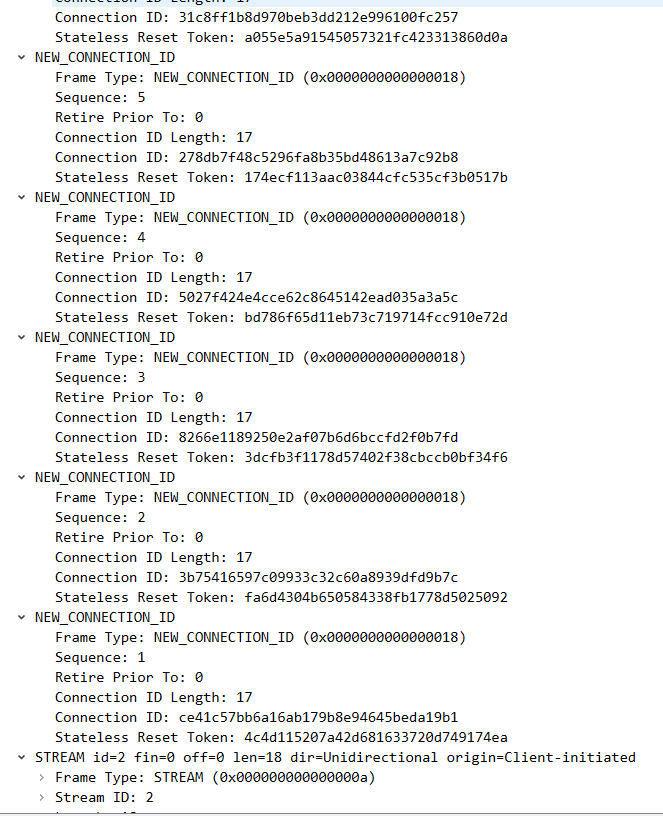
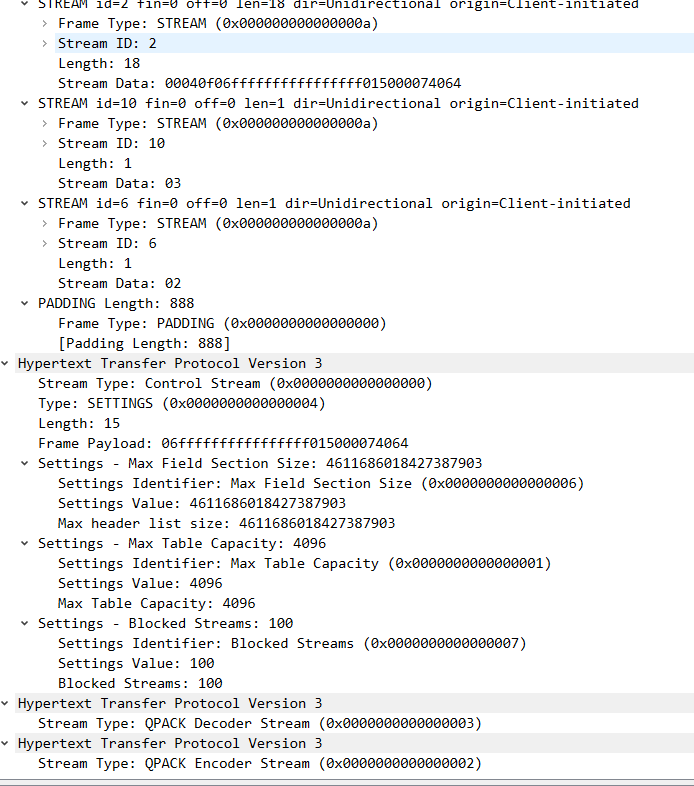
4 client回复server handshake完成和ack,以及new connectionid等;
1
2
3
4
5
6
7
8
9
10
11
12
13
14
15
16
client : handshake ,ack , new connection id frame -------> server : 2022-03-11 17:47:14.011164 127.0 .0 .1 28678 127.0 .0 .1 HTTP3 1406 Protected Payload (KP0), DCID=31399ddaebfaa9d3ffe05b3f460ce31abf24, PKN: 0 , ACK_ECN, NCI, NCI, NCI, NCI, NCI, NCI, STREAM(2), SETTINGS, STREAM(10), STREAM(6), PADDING ( long header packet : initial ACK Frame: long header packet : handshake ACK Frame : CRYPTO Frame:TLSV: Handshake Protocol: Finished short header packet : ACK Frame 5 个 NEW_CONNECTION_ID Frame STREAM Frame Padding frame http3 相关、 ) udp payload
5 server也回复new connection id帧等
1
2
3
4
5
6
7
8
9
10
client : <----------- Server :New Connection id Frame + Handshake done frame + new token frame +CryPto frame 2022 -03 -11 17 :47 :14.012652 127.0 .0.1 4433 127.0 .0.1 QUIC 853 Protected Payload (KP0), DCID=caadeb24055bf422d3693bb97b0c5c691b, PKN: 1 , NCI, NCI, NCI, NCI, NCI, NCI, DONE, NT, CRYPTO (short header packet : 5 个 NEW_CONNECTION_ID Frame Handshake done Frame new token frame Crypto frame : Tls :Handshake Protocol: New Session Ticket 应该是共享秘钥 ) udp payload
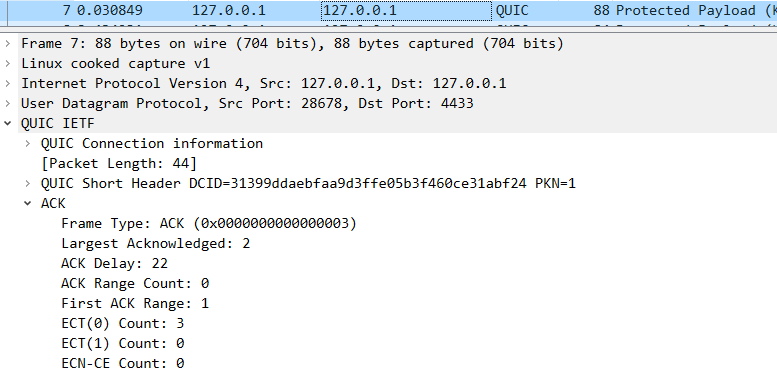
6 server回复client ack
1
2
3
4
5
6
client : <--------------- server : Ack frame; 2022-03-11 17:47:14.013868 127.0 .0 .1 4433 127.0 .0 .1 QUIC 88 Protected Payload (KP0), DCID=caadeb24055bf422d3693bb97b0c5c691b, PKN: 2 , ACK_ECN (short header packet : Ack Frame )
…数据交互
7 client回复server ack;
1
2
3
4
5
6
client :ACK frame ---> Server 2022-03-11 17 :47 :14.018355 127.0.0.1 28678 127.0 .0 .1 QUIC 88 Protected Payload (KP0), DCID=31399d daebfaa9d3ffe05b3f460ce31abf24, PKN: 1 , ACK_ECN (short header packet : Ack Frame )
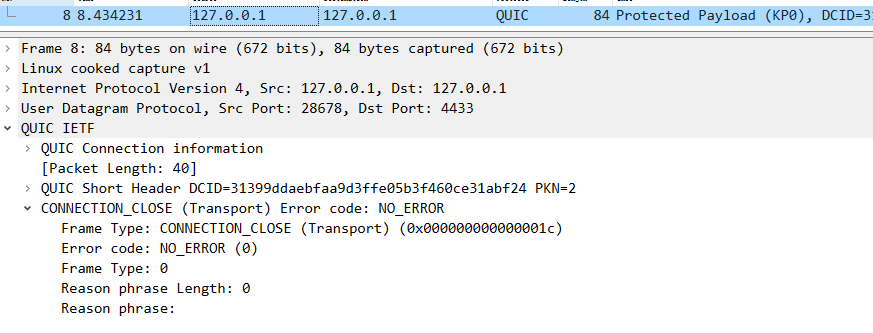
8 close:
1
2
3
4
5
6
7
client ---> server: 2022-03-11 17 :47 :22.421737 127.0.0.1 28678 127.0 .0 .1 QUIC 84 Protected Payload (KP0), DCID=31399d daebfaa9d3ffe05b3f460ce31abf24, PKN: 2 , CC (short header packet : Connection close Frame )
3 测试http3: 这里需要借助curl来拉http3的流,需要编译curl:
1
2
3
4
5
6
7
8
9
% cd ..% git clone https://github.com/curl/curl % cd curl% autoreconf -fi //参考上面安装ngtcp2,也是如下配置: % ./configure LDFLAGS="-Wl,-rpath,$PWD /../../openssl/build/lib" ./configure --with-openssl=../../openssl/build \ --with-nghttp3=../../nghttp3/build --with-ngtcp2=../../ngtcp2/build --prefix=$PWD /build % make % make install
因为我们没有写http3的详细解析,可以先借助nghttpx库将http3的请求代理到http2:https://github.com/curl/curl/blob/master/docs/HTTP3.md#quiche-version
1
2
3
4
5
6
7
git clone https://gi thub.com/nghttp2/ nghttp2.git cd nghttp2 autoreconf -fi PKG_CONFIG_PATH=$PKG_CONFIG_PATH :$PWD /../ openssl/build/ lib/pkgconfig:$PWD/ ../nghttp3/ build/lib/ pkgconfig:$PWD /../ ngtcp2/build/ lib/pkgconfig \ LDFLAGS="-L$PWD/../openssl/build/lib -static" CFLAGS=-I$PWD /../ openssl/build/i nclude ./configure --enable-maintainer-mode --prefix=$PWD/ build\ --disable-shared --enable-app --enable-http3 --without-jemalloc --without-libxml2 --without-systemd make && make install
测试:
1
2
/quic/ nghttp2/build/ bin$ ./nghttpx ../ ../../ curl/curl/ tests/stunnel.pem ../ ../../ curl/curl/ tests/stunnel.pem --backend=localhost,80 \--frontend="localhost,9443;quic"
启动nghttp3 代理,会将流量代理到 localhost 80 ,
1 2 ./nghttpx ../ ../../ curl/curl/ tests/stunnel.pem ../ ../../ curl/curl/ tests/stunnel.pem --backend=157.122 .214.119 ,482 --frontend="localhost,9443;quic" 代理到一个http flv节点
窗口2:
1
2
3
4
./curl --http3 "https://localhost:9443" --insecure 或者 ./curl --http3 "https://127.0.0.1:9443/xxx.flv" --output test.flv --insecure 拉取一条已存在的流。这个时候访问本地的nghttp3代理,到远程的flv节点。
测试webtransport: 因为ngtcp2暂时不支持webtransport,因此需要对其做改造支持,具体需要解析webtransport的特殊frame type0x41和0x54


